Wednesday, October 3, 2012

POTION No. 9 - A Charmed Halloween Tutorial

Time for another tutorial in my "Charmed Halloween" series.

POTION No. 9


Supplies and Tools Needed:
Small plastic vial with lid
Apothecary images (I found mine at The Graphics Fairy)
Resin (I used ICE Resin)
24 gauge dark annealed steel wire 
5-6 tiny clear beads 
Brown ink pad (I used Staz-On)
Green glitter
Green food coloring
Round-nose pliers
Flat-nose pliers
Wire cutters
Modge Podge
Paint brush
Scissors
Needle tool


1. Size the graphic to fit the vial and print. I added the words "Potion No. 9" and "drink if you dare".


 2. Cut the label and words out. Use the Modge Podge to glue the words onto the label so that the skull still shows. Let dry. Rub the label with the brown ink to age it. Wrap the label around the vial and glue into place.

3. Use the round-nose pliers to make a tiny loop at one end of a piece of wire. Add a bead and then use the pliers to make a curvy bend into the wire above the bead. Repeat with 4-5 more beads. Use the needle tool to poke a hole in the lid.


 4. Insert the beaded end of the wire into the vial. Place the cap back on with the wire end extending up through the hole in the lid. Make a wrapped loop at the top. (Find out how to make a wrapped loop here)


5. Remove the lid from the vial.


6. Mix the resin according to the manufacturer's instructions. Add a drop of food coloring and some glitter and stir.


7. Pour the resin into the vial to fill (make sure to leave a little space at the top so it doesn't overflow once the lid is replaced). Replace the lid. Let cure.


 For the Tag:

Remove the string from a small mailing tag. Use Modge Podge to glue an image collage to one side of it. Let dry. Repeat for the other side. Once dried, rub with brown ink to age the images. Use the string to tie the charm onto the tag.

 Front of Tag


Back of Tag


I hope you enjoyed this tutorial.
Be sure to return in a couple of days for the next tutorial
in my "Charmed Halloween" series!


More tutorials from the Charmed Halloween series:
"Spider 

Sharing With: I Gotta Create!: Wildly Original Party , Funky Junk Interiors: SNS 155 & 159

Thanks for stopping by!
 

Sunday, September 30, 2012

WATCHING EYE - A Charmed Halloween Tutorial

Just as I promised, I'm sharing the first tutorial in my

THE WATCHING EYE!


Supplies and Tools Needed:
Mike's Hard Lemonade bottle cap
Eyeball and skull images (I found mine at The Graphics Fairy)
Resin (I used ICE Resin)
24 gauge dark annealed steel wire
Round-nose pliers
Flat-nose pliers
Wire cutters
Modge Podge
Paint brush
Jeweler's saw
Drill
Small file
Scissors
Hammer

1. Size the graphics to fit the bottle cap and print. I added a tiny eye and the words "Watching You" to the skull graphic.


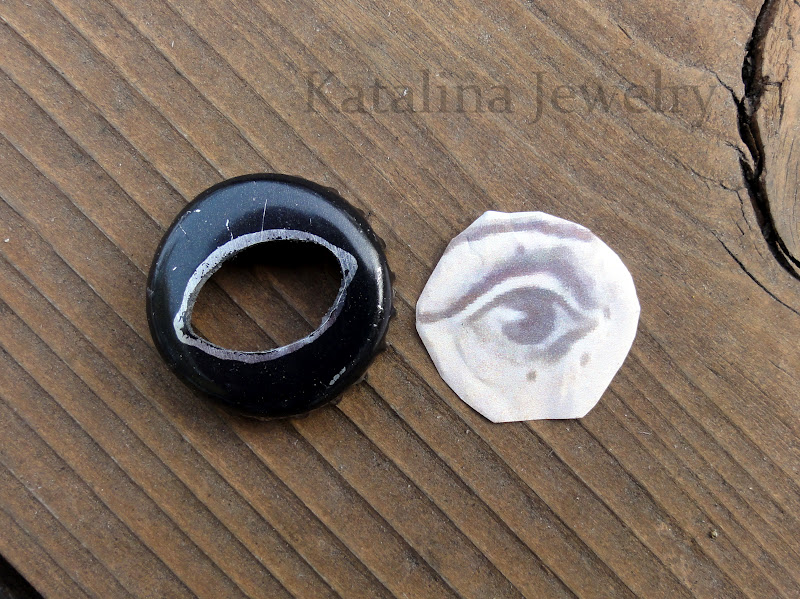
2. Drill a hole in the middle of the cap and use the jeweler's saw to cut out the lemon shape. File to smooth the edges.


3. Drill a tiny hole in the rim of the bottle cap at the center top. Make a swirl at one end of a wire. Insert the straight end of the wire through the hole and make a wrapped loop. (Find out how to make a wrapped loop here)


4. Cut the images to fit inside the cap. (Only one is shown in the photo below) Brush Modge Podge onto both of the images and let dry.  It's important to completely cover the front, back and even the sides of the paper so that the resin will not seep into the paper causing it to become transparent.


5. Use the Modge Podge to glue the images back to back into place with the eye at the front of the cap and the skull at the back. Use pliers to start bending the rim down at the back of the cap and then hammer it flat and file to smooth the edges.


6. Mix the resin according to manufacturer's instructions and carefully pour over the image at the back. Let cure.


7. Repeat with a layer of resin to cover the eye opening on the front.


For the Tag:

Remove the string from a small mailing tag. Use Modge Podge to glue an image collage to one side of it. Let dry. Repeat for the other side. Once dried, rub with brown Staz-On ink to age the images. Use the string to tie the charm onto the tag.

Front of Tag


Back of Tag


I hope you enjoyed this tutorial.

Be sure to return in a couple of days for the next tutorial
in my "Charmed Halloween" series!


More tutorials from the Charmed Halloween series:
"Spider"

This project was featured on the Graphics Fairy Brag Monday.

Thanks for stopping by!


Saturday, September 29, 2012

A Charmed Halloween!

I'm taking part in a fun Halloween Charm exchange hosted by Thespa at Vintiquities Workshop. This is my first time ever to participate in any swap so I'm super excited to see how it goes!

I've been busy creating these spooky little guys!


 There are five different styles.
A magic potion, spider, mummy, caged skeleton and a watching eye!

If you like them, please check back as I will be sharing tutorials on how to make each one over the next several days.

And best of all, I'll be sharing the charms I get in return as soon as I get my anxious little fingers on them! How fun it's going to be to receive a box of scary creations in the mail!

There's still plenty of time to enter my
***Mixed Media Jewelry E-Book GIVEAWAY!***
Enter here.


Update: The following tutorials are now posted.

Thanks for stopping by!

 
Sharing with: Funky Junk Interiors: SNS, It's Overflowing: Overflowing With Creativity Link Party

Thursday, September 27, 2012

Mixed Media Jewelry E-Book GIVEAWAY

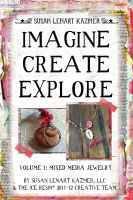
I'm excited to say that the first e-book including mixed media jewelry designs from the 2011-2012 ICE Resin Creative Team members is finished and available for purchase.

 Cover for 'Imagine Create Explore Volume 1: Mixed Media Jewelry'

It includes fifteen fabulous mixed media jewelry projects from seven designers and has easy to follow instructions for each project.

These are my projects that are featured in the e-book.

Faux Tortoise Shell Necklace


Upcycled Coffee Filter Earrings


Popcorn Popper Ring


You can preview the e-book here.

I will be giving away a free downloadable copy
of the e-book to three people. You have two chances to enter.

1. Leave a comment on this blog post.

2. Share the link to this giveaway anywhere you wish...Facebook, Twitter, your blog... and leave an additional comment saying you did.
Katalina Jewelry Mixed Media Jewelry E-Book Giveaway

THIS GIVEAWAY IS NOW CLOSED
Thanks for entering.
You can find the winners here.

My good friend Tina is also giving away a couple of copies on her blog. Her drawing is on October 20th.

Thanks for stopping by!


Monday, September 17, 2012

Vintage Tin Jewelry

The Autumn issue of Belle Armoire Jewelry is out and a couple of my vintage tin necklaces were included in the Gallery section.
 

 You can find out how to make the Heart necklace here.

This issue is loaded full of amazing and creative jewelry.
I'm lovin' those earrings!


 Included are these fun and fabulous
Wool Felted Pendants from my talented friend, Cat Kerr.


And these gorgeous rhinestone pendants
that my sweet friend, Kristen Robinson, created.


 Yep! This issue will not disappoint!


Thanks for stopping by!


Sunday, September 2, 2012

Shabby Chic Cuff - video tutorial

I created this Shabby Chic Cuff using ICE Resin, fabric and very thin copper sheet cut from a Spellbinder's die.


My video tutorial will give you step-by-step instructions for the creative process. You can also get the written instructions and supply list here on my tutorial page.

I hope you enjoy the video!
 

Thanks for stopping by!


 Sharing with: Not Just A Housewife: Show Me What Ya Got, Southern Lovely: Show & Share, Happy Go Lucky: Shine On Friday, Funky Junk Interiors: SNS, Craft-O-Maniac: Craft-O-Maniac Monday

Thursday, August 16, 2012

Rule Breaking Thrift Store Finds

I have this thrift store shopping rule: Don't buy anything unless it is on the 1/2 off sticker price for the day. I stick to it most of the time but occasionally RULES are made to be BROKEN and today I did just that! These finds were just too juicy to wait for their 1/2 off day.

I thought these old binoculars were pretty cool but I wasn't sure I really needed them...what would I do with them?


Then I discovered the lenses came off...aha!
I could use the lenses in jewelry projects so I paid the $2.99
and assured myself it was a good purchase!


The smaller lenses have writing on them.
 One says SMOKE TANSILL'S PUNCH - 5 CENT CIGAR
and the other one says R.W. TANSILL & CO. - CHICAGO


Here is another item I don't really need and can't use for jewelry projects but it could make a very cool mixed media assemblage/collage piece and it was only $1.99.


It was the carved detail at the top that suckered me in!


I didn't even blink an eye to think as to whether I should pay the full price of $1.99 for this gorgeous brass case. This will definitely show up in one of my jewelry designs!


Love, love, love the curved oval shape and the little mirrored door!


Breaking the Rules Can Be Fun!!

Thanks for stopping by!
 

Friday, August 10, 2012

Going Green!

One of my designs is going green with Green Craft magazine!


is featured in the Autumn 2012 issue of Green Craft Magazine.


This necklace is so easy to make. I just cut the leather flowers from a pair of sandals, embellished them and then wired them onto vintage pearl strands. You can find out more about this necklace here.


Thanks for stopping by!