Just as I promised, I'm sharing the first tutorial in my
THE WATCHING EYE!
Supplies and Tools Needed:
Mike's Hard Lemonade bottle cap
24 gauge dark annealed steel wire
Round-nose pliers
Flat-nose pliers
Wire cutters
Modge Podge
Paint brush
Jeweler's saw
Drill
Small file
Scissors
Hammer
1. Size the graphics to fit the bottle cap and print. I added a tiny eye and the words "Watching You" to the skull graphic.
2. Drill a hole in the middle of the cap and use the jeweler's saw to cut out the lemon shape. File to smooth the edges.
3. Drill a tiny hole in the rim of the bottle cap at the center top. Make a swirl at one end of a wire. Insert the straight end of the wire through the hole and make a wrapped loop. (Find out how to make a wrapped loop here)
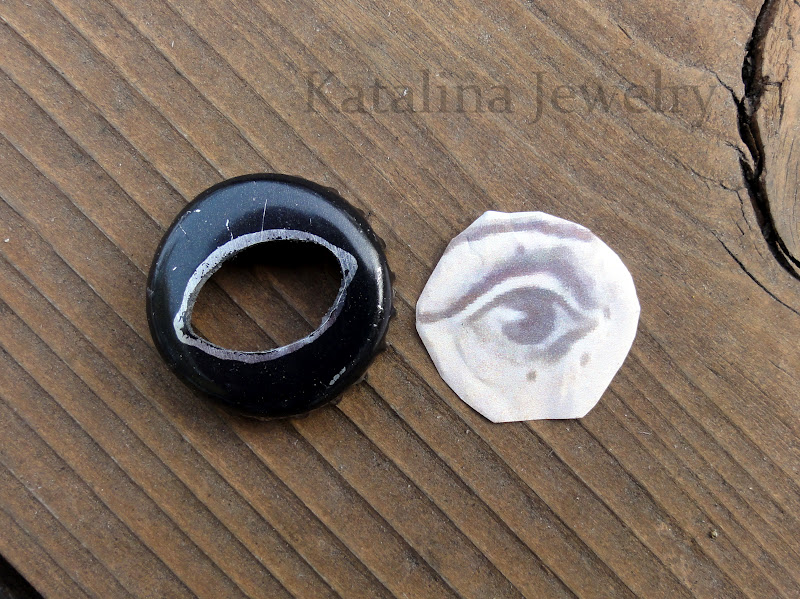
4. Cut the images to fit inside the cap. (Only one is shown in the photo below) Brush Modge Podge onto both of the images and let dry. It's important to completely cover the front, back and even the sides of the paper so that the resin will not seep into the paper causing it to become transparent.
5. Use the Modge Podge to glue the images back to back into place with the eye at the front of the cap and the skull at the back. Use pliers to start bending the rim down at the back of the cap and then hammer it flat and file to smooth the edges.
6. Mix the resin according to manufacturer's instructions and carefully pour over the image at the back. Let cure.
7. Repeat with a layer of resin to cover the eye opening on the front.
For the Tag:
Remove the string from a small mailing tag. Use Modge Podge to glue an image collage to one side of it. Let dry. Repeat for the other side. Once dried, rub with brown Staz-On ink to age the images. Use the string to tie the charm onto the tag.
Front of Tag
Back of Tag
I hope you enjoyed this tutorial.
Be sure to return in a couple of days for the next tutorial
More tutorials from the Charmed Halloween series:
Thanks for stopping by!