These shoes were made for walking and other things...
I must say I've had a lot of published mileage out of my "A Girl and Her Shoes" series. Biker Chic, Geometry, Butterfly, and Spider were the first to show up in the Summer '12 issue of Jewelry Affaire . Dressed Up Pearls soon followed with an article in the Autumn '12 issue of GreenCraft.
And now Autumn Leaves has found its way into the Winter '13 issue of Altered Couture.
I guess this gives this girl one more reason to love her shoes!
There's another reason why this issue of Altered Couture is so special to me...
My Sister-in-Law, Susan from Second Chances by Susan, also has an awesome article in it! She shows you how to transform a pajama jumpsuit into a beautiful dress.
How fun for us to be together in the same magazine!
Thanks for stopping by!
Thursday, November 29, 2012
From One Accessory to Another - Altered Couture Article
Labels:
a girl and her shoes,
altered couture,
jewelry,
katalina jewelry,
kathy thompson,
magazine article,
published,
published work,
shoes,
stampington
Location: Oregon, USA
Oregon, USA
Tuesday, October 30, 2012
Halloween Charm Swap
Remember my Charmed Halloween series? It all started when Thespa from Vintiquities Workshop invited me to join in on her very fun Halloween Charm exchange.
I made 15 charms. Three each of five different styles.
You can find a tutorial on how to make each one:
"Mummy"
"Spider"
I sent my charms off to Thespa and in a few days received 15 awesome charms back. I was amazed at the variety...all so very cool and with the added bonus of fun and creative packaging! I almost hated to remove them from their tags!
I didn't want to make a bracelet that had every single charm on it - my wrist are very small and couldn't pull it off. My solution was to create a bracelet that I could add a few of the smaller charms to. It will be very easy to swap them out and use some of the other charms for a different look. It's like getting several bracelets in one!
I plan to use some of the larger charms for necklace pendants.
Check out Thespa's Halloween blog hop link party
to see what everyone else created!
Happy Halloween!
Labels:
bracelet,
charm bracelet,
charm exchange,
charmed halloween,
charms,
halloween,
jewelry
Location: Oregon, USA
Oregon, USA
Saturday, October 27, 2012
I Wanna Be Edward's Girl!
Edward Scissorhands!
Really, what girl watched that movie and did not
fall in love with Edward (Johnny Depp)?
Who wouldn't wanna be Edward's girl for Halloween?!
Thanks to my awesome costume creating son, Brandon,
I already had the coolest part of the costume right at my fingertips
or maybe I should say "scissortips"!
You can take a look at Brandon's
more authentic version of Edward here.
Brandon let me use the super cool scissorhands he made by cutting scissor shapes from thin wood, painting them and attaching them to black leather gloves. Oh, I should mention the coolest part about them... he attached all the
scissors to a working mechanism so that he could actually move them
(together or individually) with his fingers...now that's amazing!
Brandon's clever belt system thingy looked great over my $2.99 thrift store shirt. Just for fun I added a few slashes around the collar - those scissorshands can be dangerous! Throw in a $9.99 thrifted black leather skirt and the outfit is almost finished!
This is a girly version of Edward so, of course, a few accessories were called for! I created a necklace/pendant featuring my "boyfriend" Edward from a $1.00 thrifted silver belt. I attached what was leftover from that same belt to a black headband to add a little "Edward-ish" bling into my hair. I wrapped a couple of thrifted belts around my boots to amp them up a bit and the outfit was completed!
Just a quick haircut before I head out to the party!
Brandon has won many costume contests and his scissorhands proved to be a huge success once again as I was the big winner at my Bunko group! The prize was a case of tennis balls, which among my bunko/tennis playing friends was a very coveted prize!
Happy Halloween!
Sharing with: Funky Junk Interiors: SNS 159, Six Sisters' Stuff: Strut Your Stuff Saturday, I Gotta Create!: Wildly Original Linky Party
Labels:
black leather,
brandon,
costume,
edward scissorshands,
halloween,
katalina jewelry,
kathy thompson,
leather,
thrift store finds
Location: Oregon, USA
Oregon, USA
Thursday, October 25, 2012
Caged Skull - A Charmed Halloween Tutorial
Time for the last tutorial in my "Charmed Halloween" series.
CAGED SKULL
Supplies and Tools Needed:
For the Charm:
Plastic skull, about 3/4" x 1/2" (Mine was from a purchased bracelet)
For the Charm:
Plastic skull, about 3/4" x 1/2" (Mine was from a purchased bracelet)
Two tiny green iridescent beads
Dark annealed steel wire, 24 & 28 gauge
Round-nose pliers
Flat-nose pliers
Wire cutters
Epoxy glue (I used E6000)
For the Tag:
Small shipping tag
Brown ink pad (I used Staz-On)
Desired images (I found mine at The Graphics Fairy)
Modge Podge
Paint brush
Scissors
1. Cut the bracelet apart and choose a skull.
2. Glue one bead into each eye socket. Tip: Slide the bead on a piece of wire, apply a small dab of glue, place into the socket, hold for a minute and then slide wire out while holding bead into place with your finger.
3. Cut three 6" pieces of 24 gauge wire and one 6" piece of 28 gauge. Place the center of a 24 gauge piece in the flat-nose pliers and bend the ends upward to form a "U" shape. Repeat for the other two. Bundle the wires together and secure at the center bottom by wrapping several times with the 28 gauge wire.
4. Trim the short tail of the 28 gauge wire that extends downward. Slide the skull on the long tail that extends upward.
5. Spread the 24 gauge wires apart and gather them together above the skull to form the cage.
6. Wrap the 28 gauge wire around the other wires several times to secure them into place and then trim the 28 gauge wire.
7. Spread the 24 gauge wires so that five are extending outward and one is extending upward.
8. Trim each wire extending outward to about 1/2" and use the pliers to curve them downward over the wrapped area.
9. Make a wrapped loop in the wire extending upward.
(Find out how to make a wrapped loop here)
For the Tag:
Remove the string from the mailing tag. Use Modge Podge to glue an image collage to one side of it. Let dry. Repeat for the other side. Once dried, rub with brown ink to age the images. Use the string to tie the charm onto the tag.
Front of Tag
Back of Tag
I hope you enjoyed this tutorial.
More tutorials from the Charmed Halloween series:
"Mummy"
"Spider"
Sharing with: Funky Junk Interiors: SNS 159
Thanks for stopping by!
Labels:
cage,
charmed halloween,
charms,
exchange,
graphics,
halloween,
imprisoned,
paper crafts,
skull,
tag,
trick or treat
Location: Oregon, USA
Oregon, USA
Tuesday, October 16, 2012
Spider - A Charmed Halloween Tutorial
Time for another tutorial in my "Charmed Halloween" series.
SPIDER
Supplies and Tools Needed:
For the Charm:
Black button (shank style)
28 gauge dark annealed steel wire
Round-nose pliers
Flat-nose pliers
Wire cutters
For the Tag:
Small shipping tag
Brown ink pad (I used Staz-On)
Desired images (I found mine at The Graphics Fairy)
Modge Podge
Paint brush
Scissors
1. Select a black button with a shank back. I chose one that had a bit of a colored design.
2. Cut four 1 1/2" long pieces of wire. Insert them through the shank.
3. Cut an 8" piece of wire. Loosely fold the wire into half and wrap around the shank and wires a couple of times with the tails extending outward in the same direction. Twist the tails together to secure.
5. Make a wrapped loop at the end of the wire. (Find out how to make a wrapped loop here) Use the round-nose pliers to kink the wire.
6. Spread the wires apart to create the legs. Use the very tip of the round-nose pliers to make a tiny loop at the end of each leg.
7. Use the flat-nose pliers to make a bend into each leg.
For the Tag:
Remove the string from the mailing tag. Use Modge Podge to glue an image collage to one side of it. Let dry. Repeat for the other side. Once dried, rub with brown ink to age the images. Use the string to tie the charm onto the tag.
Front of Tag
Back of Tag
I hope you enjoyed this tutorial.
Be sure to return in a couple of days for the last tutorial
in my "Charmed Halloween" series!
More tutorials from the Charmed Halloween series:
"Mummy"
Sharing with: Funky Junk Interiors: SNS 159
Thanks for stopping by!
Labels:
black,
button,
charm exchange,
charms,
graphics,
halloween,
paper crafts,
spider,
tag,
web
Location: Oregon, USA
Oregon, USA
Thursday, October 11, 2012
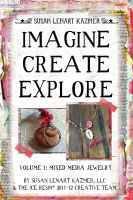
Winners of the Mixed Media Jewelry E-Book GIVEAWAY
I put all the entries into a hat and asked my husband to draw out three winners for the Volume 1: Mixed Media Jewelry E-Book.
The winners are:
Thoughtfulhands
Beetique
Cathy
Congratulations to Thoughtfulhands, Beetique, & Cathy! And thanks to all who took time to participate.
For another chance to win this E-Book, visit my friend Tina at PatinaMarie as she is also giving away a couple of copies. Her drawing will be on October 20th.
Volume 2 of this E-Book is now available and I will be having a giveaway for it within a couple of weeks.
Thanks for stopping by!
Labels:
creative team,
e-book,
giveaway,
ice resin,
jewelry,
mixed media,
published,
winners
Location: Oregon, USA
Oregon, USA
Mummy - A Charmed Halloween Tutorial
Time for another tutorial in my "Charmed Halloween" series.
MUMMY
Supplies and Tools Needed:
1 small wood rectangle (about 3/4" x 1")
2 small plastic googly eyes
scraps of muslin
coffee or tea (to stain the muslin)
24 gauge dark annealed steel wire
Brown ink pad (I used Staz-On)
Round-nose pliers
Flat-nose pliers
Wire cutters
Modge Podge
Paint brush
Scissors
Sandpaper
For tag: small shipping tag, desired images (I found mine at The Graphics Fairy)
1. Tear the muslin into several 1/4" - 3/8" wide strips. Immerse the strips into coffee or tea to stain them. Remove and rinse. Ball them up and let them dry naturally or use a blow dryer. (Wadding them into a ball will give them a crinkled effect). Once dry, separate the strands.
3. Wrap wire lengthwise around the wood piece and finish at the top with a wrapped loop. (Find out how to make a wrapped loop here)
5. Loosely glue muslin strips in a messy fashion to cover the first layer of muslin leaving the eyes uncovered.
6. Apply a thick coat of Modge Podge to the muslin to protect it and keep it from fraying. Let dry.
7. Lightly sand the muslin to remove some of the sharpness of the stiffened fabric.
For the Tag:
Remove the string from the mailing tag. Use Modge Podge to glue an image collage to one side of it. Let dry. Repeat for the other side. Once dried, rub with brown ink to age the images. Use the string to tie the charm onto the tag.
Front of Tag
Back of Tag
I hope you enjoyed this tutorial.
Be sure to return in a couple of days for the next tutorial
in my "Charmed Halloween" series!
More tutorials from the Charmed Halloween series:
"Spider"
Sharing with: Fireflies and Jellybeans: show Off Your Stuff , I Gotta Create!: Wildly Original Party, Happy-Go-Lucky: Shine on Friday, Here Comes the Sun: Fabulous Friday, Funky Junk Interiors: SNS 156 & 159, Craft-O-Maniac: Craft-O-Maniac Monday
Thanks for stopping by!
Labels:
charmed halloween,
charms,
craft,
eyes,
fabric,
katalina jewelry,
kathy thompson,
mummy,
muslin
Location: Oregon, USA
Oregon, USA
Subscribe to:
Posts (Atom)