Tuesday, February 28, 2012

Lucky Me!

Maybe it's just an early dose of the St. Patty's Day lucky 4-leaf clover but I've certainly been lucky the last few weeks.

A few weeks ago I was ecstatic when Missy from Marvelously Messy contacted me to let me know that I was the winner of her My Memories Scrapbook Suite giveaway. I haven't had a chance to create anything yet using this program but I did play around with it a bit and it's going to be fun!

 And then just yesterday I found out from Kim over at Too Much Time On My Hands that I was the lucky winner of a darling messenger bag from Crafty Calista.


Now that's a lotta luck!

May the lucky 4-leaf cover just keep passing on its luck to all of you throughout the upcoming month of March!

Tuesday, February 14, 2012

Hook and Eye Clasp - Basic Wire Working Technique Series

Welcome back to my teaching series featuring basic wire working techniques. I hope you had a chance to check out the other techniques in this series  "Wrapped Loops",  "Links: Beaded and Crazy", and "Jump Rings".

Today I will be sharing how to make a hook and eye clasp.


Why use a handcrafted hook and eye clasp over a ready made clasp?
It will add much more interest to your design and give that extra unique quality that transforms it into a piece of wearable art.


Tools and Supplies:
Chain-nose pliers
Round-nose pliers
Stepped forming pliers
Flush cutters (one side of the cutters are flush and make a straight cut, the other side makes a "V" cut)
Small jewelers file
Hammer
Steel bench block (or something solid to hammer on)
Wire: I've used 16 gauge copper for my photos. I suggest you begin with copper; it's malleable which makes it easy to work with and it's inexpensive.


The picture above shows two pairs of chain-nose pliers, round-nose pliers, and flush cutters. Below is what stepped forming pliers look like.


A note before I start the tutorial: 
In my photos I did not leave the looped end that will attach to the chain open. If you are going to use a jump ring to attach the clasp then you can go ahead and close the loops as I did in the photos. If you choose to attach it directly to a fused chain link then you will need to leave the loop end open (see "Links: Beaded and Crazy" to see how to connect loops).


Hook Clasp

Hammer one end of an 8" wire to flatten it.


Place the round-nose pliers at the tip of the flattened area.


Curl the wire around the pliers.


Your piece should look like this.


Place the base of the round-nose pliers on the wire above the curl (how far up will determine how long the clasp will be).


Use your fingers to bend the wire back towards
the underside of the curl.


Place the chain-nose pliers on the wire and make a 90 degree bend.


Make a wrapped loop (click here to refer to my earlier tutorial on wrapped loops). Trim the wire and file the end smooth.


Hammer to add texture and strength.
(Hammering metal work hardens it and helps it to keep its shape.)
Your finished hook clasp should look like this.


Eye Clasp

Make a wrapped loop  at one end of an 8" wire (click here to refer to my earlier tutorial on wrapped loops). Place the stepped forming pliers on the wire (each tier is a different diameter - use the tier that will make the size of loop you desire).


Wind each wire tail until they meet and fill the space
between the loops. Trim ends and file to smooth them.


Hammer the loops to add texture and strength.
Your finished eye clasp should look like this.


The finished hook and eye clasp set should look like this.


Here are a few examples of where I have used handmade hook and eye clasps in my designs. Notice that sometimes I just use the hook part and use a large handmade jump ring for the eye part and sometimes I added a bead to the clasps.


This will be the last (at least for a little while) in my Basic Wire Working Technique Series. I hope these tutorials have helped you in some way. Thanks for checking them out!

Sharing with: Funky Junk Interiors: SNS

Wednesday, February 8, 2012

nICE surprise!

OK, I have been anxiously waiting for today! Why? Because this is the day that I finally get to shout out about an incredible opportunity that I've been given.

If you follow along with my blog you will know that I have posted several projects that I've made using ICE Resin®. Remember this one? My Shake It Up necklace is just one example where I've used the resin.


Well, a few weeks ago a I received an email from Kristen Robinson, the coordinator for the ICE Resin® Creative Team, and she asked me to join the talented team of designers. WHAT? REALLY? Now that is what I call a nICE surprise! I think I read the email at least 8 times just to make sure I was reading it correctly before I responded with a huge
"YES"

My official introduction is happening today over at the ICE QUEEN E-ZINE. If you have a moment and would like to, I'd love for you to hop on over to check it out and maybe even leave a comment there. Thanks for sharing in the excitement with me!

Sunday, February 5, 2012

Jump Rings Tutorial - Basic Wire Working Technique Series

Welcome back to my teaching series featuring basic wire working techniques. I hope you had a chance to check out the first two techniques in this series  "Wrapped Loops" and  "Links: Beaded and Crazy".
Today I will be sharing how to make jump rings.
 

Jump rings are readily available and fairly inexpensive so most of the time it makes sense just to purchase them. However, there are times when I find a need to make my own. I often times work with dark annealed steel wire and cannot purchase jump rings that are from the same wire. By making my own, I can match the wire perfectly. Also, there are occasions when I want a size - usually very large - that I do not have and therefore need to make it myself.


Tools and Supplies:
Two pairs of chain-nose pliers
Flush cutters (one side of the cutters are flush and make a straight cut, the other side makes a "V" cut)
Knitting needle in various sizes or any round object to wrap the wire around
Small jewelers file
Wire: I've used copper for my photos. I suggest you begin with copper; it's malleable which makes it easy to work with and it's inexpensive.


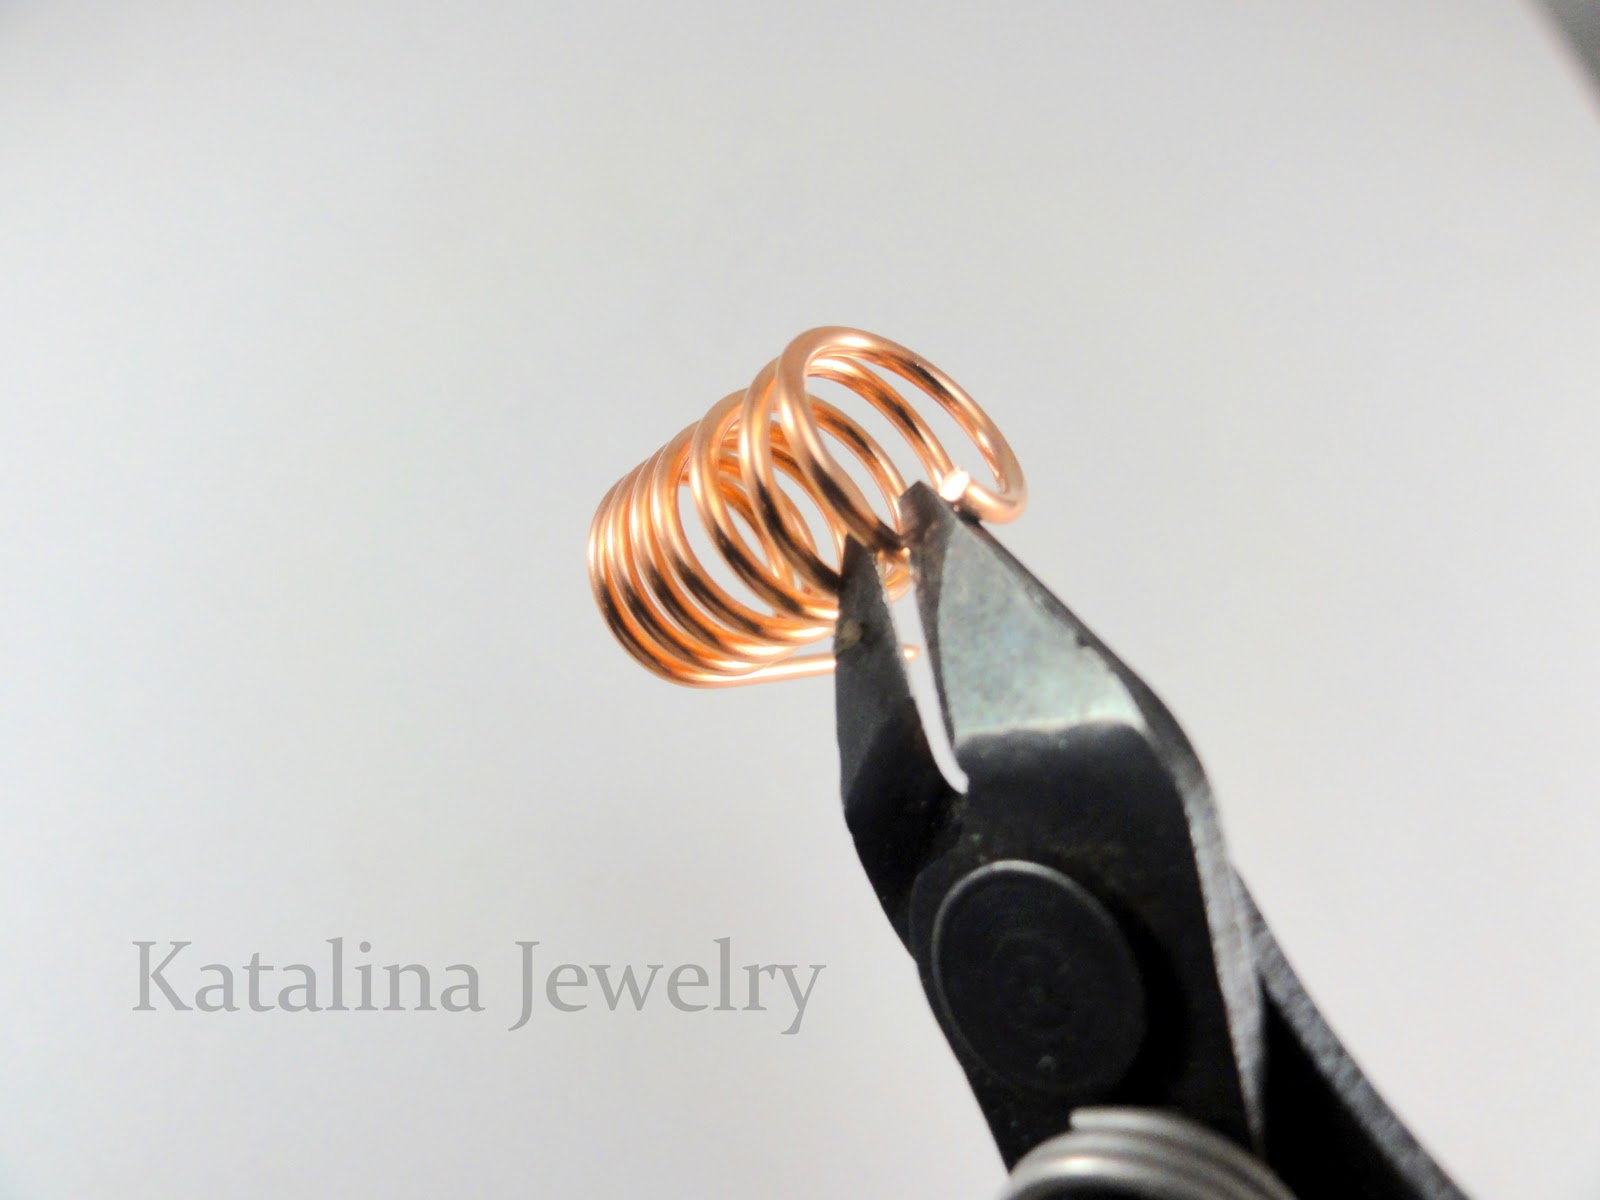
Wrap a long piece of wire several times around a knitting needle or other object that is the same diameter that you would like the finished size or your jump rings to be.


Remove it from the needle. Use the flush cutters to trim one end of the coiled wire (make sure to place the straight edge of the cutters inward facing the coils).


 Place the cutters (with the flush side the opposite direction as before) onto the next coil and trim even with the first cut to create a round circle of wire.


Place the cutters (flush side towards the coils) and trim off the rough cut edge left from the previous cut. You are now ready to make another jump ring as before. Use the jewelers file to smooth out the edges. Use two pairs of pliers to open and close the jump rings.

Your finished jump rings should look like this.


Here are few examples of when I have used handcrafted jump rings.


Thanks for checking out this tutorial. 
Be sure to return for a visit in a few days as I will be posting the final technique in my Basic Wire Working Series
"Hook and Eye Clasps".

Wednesday, February 1, 2012

Step 2 - February - Tin Heart

I'm excited to say that I have completed step 2 - February's project - of my JA (Jewel-aholics Anonymous) 12-step program from my earlier post "My Addiction".


It's no surprise that I would choose to make a heart themed necklace considering it is February. It may surprise you however, to find out what the heart is made of.

A 50 cent thrifted tin canister!


And, of course, some jewels from my addiction stash.


I used tin snips to cut a heart shape from the red part of the can. I also cut 4 small rectangles (not pictured) to use as links. Wear safety glasses and leather work gloves when cutting tin.


I hammered and scratched the surface of each piece with sand paper  to add some texture. I sanded, applied copper tape and soldered the edges of each piece and put them in a pickle solution for a couple of minutes to remove the flux. The pickle solution darkened the
tin in areas - even the back looks kinda cool!


I removed the pin back of a vintage brooch and glued it to the top center of the heart. Once the glue was dry, I applied some
ICE Resin® to each piece and let it cure for several hours.


I needed some holes in the pieces so I used this
handy little tool that easily drills through thin metal.


I added a pearl drop to the pendant. I fashioned the chain from bits and pieces of gold and pearl rosary chain (both from my stash)
along with the tin links that I made.


I've made a few more necklaces from vintage tins but I have plans for them and will have to save them for later to share with you.

Below is where you can check out my other
JA (Jewel-aholics Anonymous) projects.
January - "Snowflake"
March - "Good Luck Wishes"
June - "It's Heating Up"
July - "Golden Dreams"
Bonus Project - "Masquerade Mask"

Saturday, January 28, 2012

"Weighing" In

Look what I found the other day at the thrift store!


I've been wanting one of these for a long time.


It's not as old and as cool as some of the ones I've seen around blogland but I was happy to find it! So much so that I went against my usual "wait for 1/2 off day and if it's still there I'll buy it" policy and paid the full price of $4.99. I have no idea if that's too much or a good deal, I just know it was worth it to me!


The most obvious place to use it would have been in my kitchen but I don't like to clutter up my counters. It makes a great plant stand at the end of my hallway though!